Showing posts with label bloggers. Show all posts

Monday, August 14, 2017

Too Much of a Good Thing?

The first time I came across a Rifle Paper Co. product, I think I audibly gasped. Maybe I was at Paper Source, or a stationary store ...or was it Anthropologie? I loved the style instantly and I'm sure I thought something like "FINALLY!-- A brand whose aesthetic perfectly matches my tastes!" (yes, these are how my thoughts sound).

I think my first purchase was a set of "thank you" cards. It was several years ago, back when they were mainly doing stationary and paper products, and were just starting to dip their toes into other accessories, like phone cases and small zippered bags. 

After that, as soon as I (also finally) jumped on the iPhone train, I got a Rifle Paper Co. phone case, and I would get the odd compliment on it, from other fans of the brand, who sometimes weren't even aware that the product existed. "I love your Rifle phone case! Where did you get it?!" I think the brand was still kind of flying under the mainstream radar at that point?

Over the past several years, I've gradually accumulated RPC stationary, greeting cards, calendars, coasters, art prints, cosmetics bags, phone cases, and anything else I could reasonably get my hands on. I just found myself in love with everything Anna created and I wanted to sprinkle it everywhere in my life.

It felt like the designs added a clever, interesting, artistic touch to my style. Modern yet retro, with enticing color schemes and a dash (but not too much) of whimsy. I loved it!

Like most sewers, back when I was re-entering the sewing world, as an adult (um 8 years ago?), a significant issue for me was finding fabric that I actually wanted to wear -- it needed to be interesting and cute, but also appropriate for garments. Not quilting cotton. Exploring online, and occasionally at JoAnn's, I found some suitable fabrics here and there that helped somewhat quench my thirst for eye-catching prints and colorful designs I could make into clothes.

I remember wishing back then, "If ONLY Rifle would design FABRIC." That would be amazing and I could then proceed to make ALL the clothing of my dreams, obviously.

When RPC eventually released their first fabric line, I was delighted. Hallelujah! I can make my own Rifle clothes! The possibilities are endless! My clothing will be unique AND exactly the style I want it to be. Also, rayon everything!  This is THE BEST!

I pre-ordered some Les Fleurs rayon as a birthday gift to myself and, once it showed up in the mail, I promptly tucked it away in my embarrassing fabric stash to await the perfect project. 

Somewhere along the way, before even cutting into the fabric, I started to feel less excited.

Over the past year or so, I found that clothing other bloggers and IG users made from the same, bold Rifle prints really started to feel boring and all the same to me, regardless of the actual style of the garment. Interesting details became invisible to me. The fabric appeared to be wearing the person, no garment even making a blip on my radar. It seemed like all I could see was Rifle fabric. Rifle, Rifle, Rifle, Rifle. 

Fast forward to present day. I now cringe as I scroll through Instagram (numerous times a day because I'm addicted). Rifle's latest (third? I've lost count) line of fabric is out and it feels like everyone's starting to use Rifle everything... yet again. (Also they offer Keds now, too?!) I can't escape it. It's like I'm suffocating in the pretty, painterly, detailed, perfect-color-combination, prints. It feels like too much. 

I didn't know that I could get sick of a style that seemed so well-suited to my own.

My beautiful periwinkle fabric is still siting in my stupid fabric stash and now I'm realizing I'm officially sick of all things Rifle Paper Co. I'm hoping to wait this out and fall back in love with my treasured cloth -- maybe next spring? 

I'm dismayed to admit I'm experiencing #RPCOverload and am totally burned out. How are you faring?

Saturday, January 14, 2017

Finished Project: Lemon Laurel

Attempting to document at least some of the backlog of completed sewing projects from the last few months! Today, we have a Collette Patterns Laurel dress in a bold lemon print.


The fabric is the same lightweight cotton sateen by Gertie for Joann's that I used for my Winslow Culottes.  If you follow me on IG, you know I looove this fabric. It's so soft and the colors are great. One thing I really appreciate about it is that what would normally be a very summery/springtimey print can work with more wintry wardrobe items, too, due to the black background! Please, fabric designers of the world, make more fun bright prints on dark backgrounds!!

I ended up deciding to throw my plan to use this remaining yardage to make a crop top to match my culottes (for a little play-set look) out the window, as I came to realie I would not actually wear something like that more than once in real life. I recall having the waistband get a bit stretched out during the construction process for my culottes in this fabric, but I just thought it was a one-off. Silly me. Though this sateen does not contain any stretch fibers, it does tend to stretch out a bit as you handle and work with it -- the more handling, the more stretching. By the time I'd finished sewing the neckline bias facing on this dress, the entire neckline had stretched out quite noticeably, causing it to ripple and not lay flat -- WHY didn't I stay-stitch beforehand?! A word to future Sue: stay-stitch necklines!!!!! Just do it.


Now, if you've read this blog for a while, you'll know how much I like the Laurel dress pattern. I've also sewn it as a dress and a top for friends, over the years, so I'd like to think I'm rather familiar with it! Because it has been a little while since making one of these for myself, I knew I'd need to cut a new, larger size, but I think I over-compensated for my larger measurements. It's hard to say, though, with the fabric stretching issue. Did I cut this out too big, or did it grow? The fit is not quite right.


Jump!

Teapot!

Talk about a quick, easy project turning into something oddly challenging! [Insert here: fabric joke on making lemonade from lemons - ha, ha, ha] As you can see, I even tried to take things up a notch in photographing it with some new poses!

But, even back to the construction, once I realized the neckline was stretched out and crazy-looking, I knew I needed to try something different. I took a deep breath, cut around the entire neckline to trim the bad part off, and then traced the remaining neckline curve to make my own facing pieces. If you'd asked me in advance if I knew how to do that or thought I ever would, I'd have said "no," but I found that having sewn my fair share of facings in my sewing career, it was not difficult to come up with how to draft my own. I ended up basically tracing the shape of the neckline, adding seam allowances at the shoulders, and extending the whole neckline shape down a couple inches. I used a sturdier black cotton broadcloth for the facing pieces to try to help stabilize things there. It pretty much worked, but I didn't quite make the facings long enough, so they like to flip up a little bit (yes, I under-stitched) even after stitching them down in the shoulder seam ditch. Womp womp.


The verdict is that I love this fabric but not as this dress. The shoulders don't seem to sit right and the adjusted scooped shape of the front and back neckline are a little odd after my re-facing. I'm not sure if the whole thing was able to stretch out enough during construction to make the entire dress too big (apart from the stretched neckline), or if I just need to go down a size. It can be tricky when you change sizes after having determined a TNT pattern at a size different than you are now! I was worried that anything smaller than this would not fit, but I think it ended up being a bit more of a sack -- or pillow case, as a friend noted when I wore it out in real life -- than the casually loose shift I'd envisioned.

I think, to be sure, I have to try it out again in a non-secretly-stretching fabric and see where that takes me!

Saturday, December 31, 2016

Finished Project: Colorblocked Linden

Happy New Year! I have a little backlog of finished projects to share, but instead of picking up with them in order, I'll share the most recent one I completed, since it's fresh!


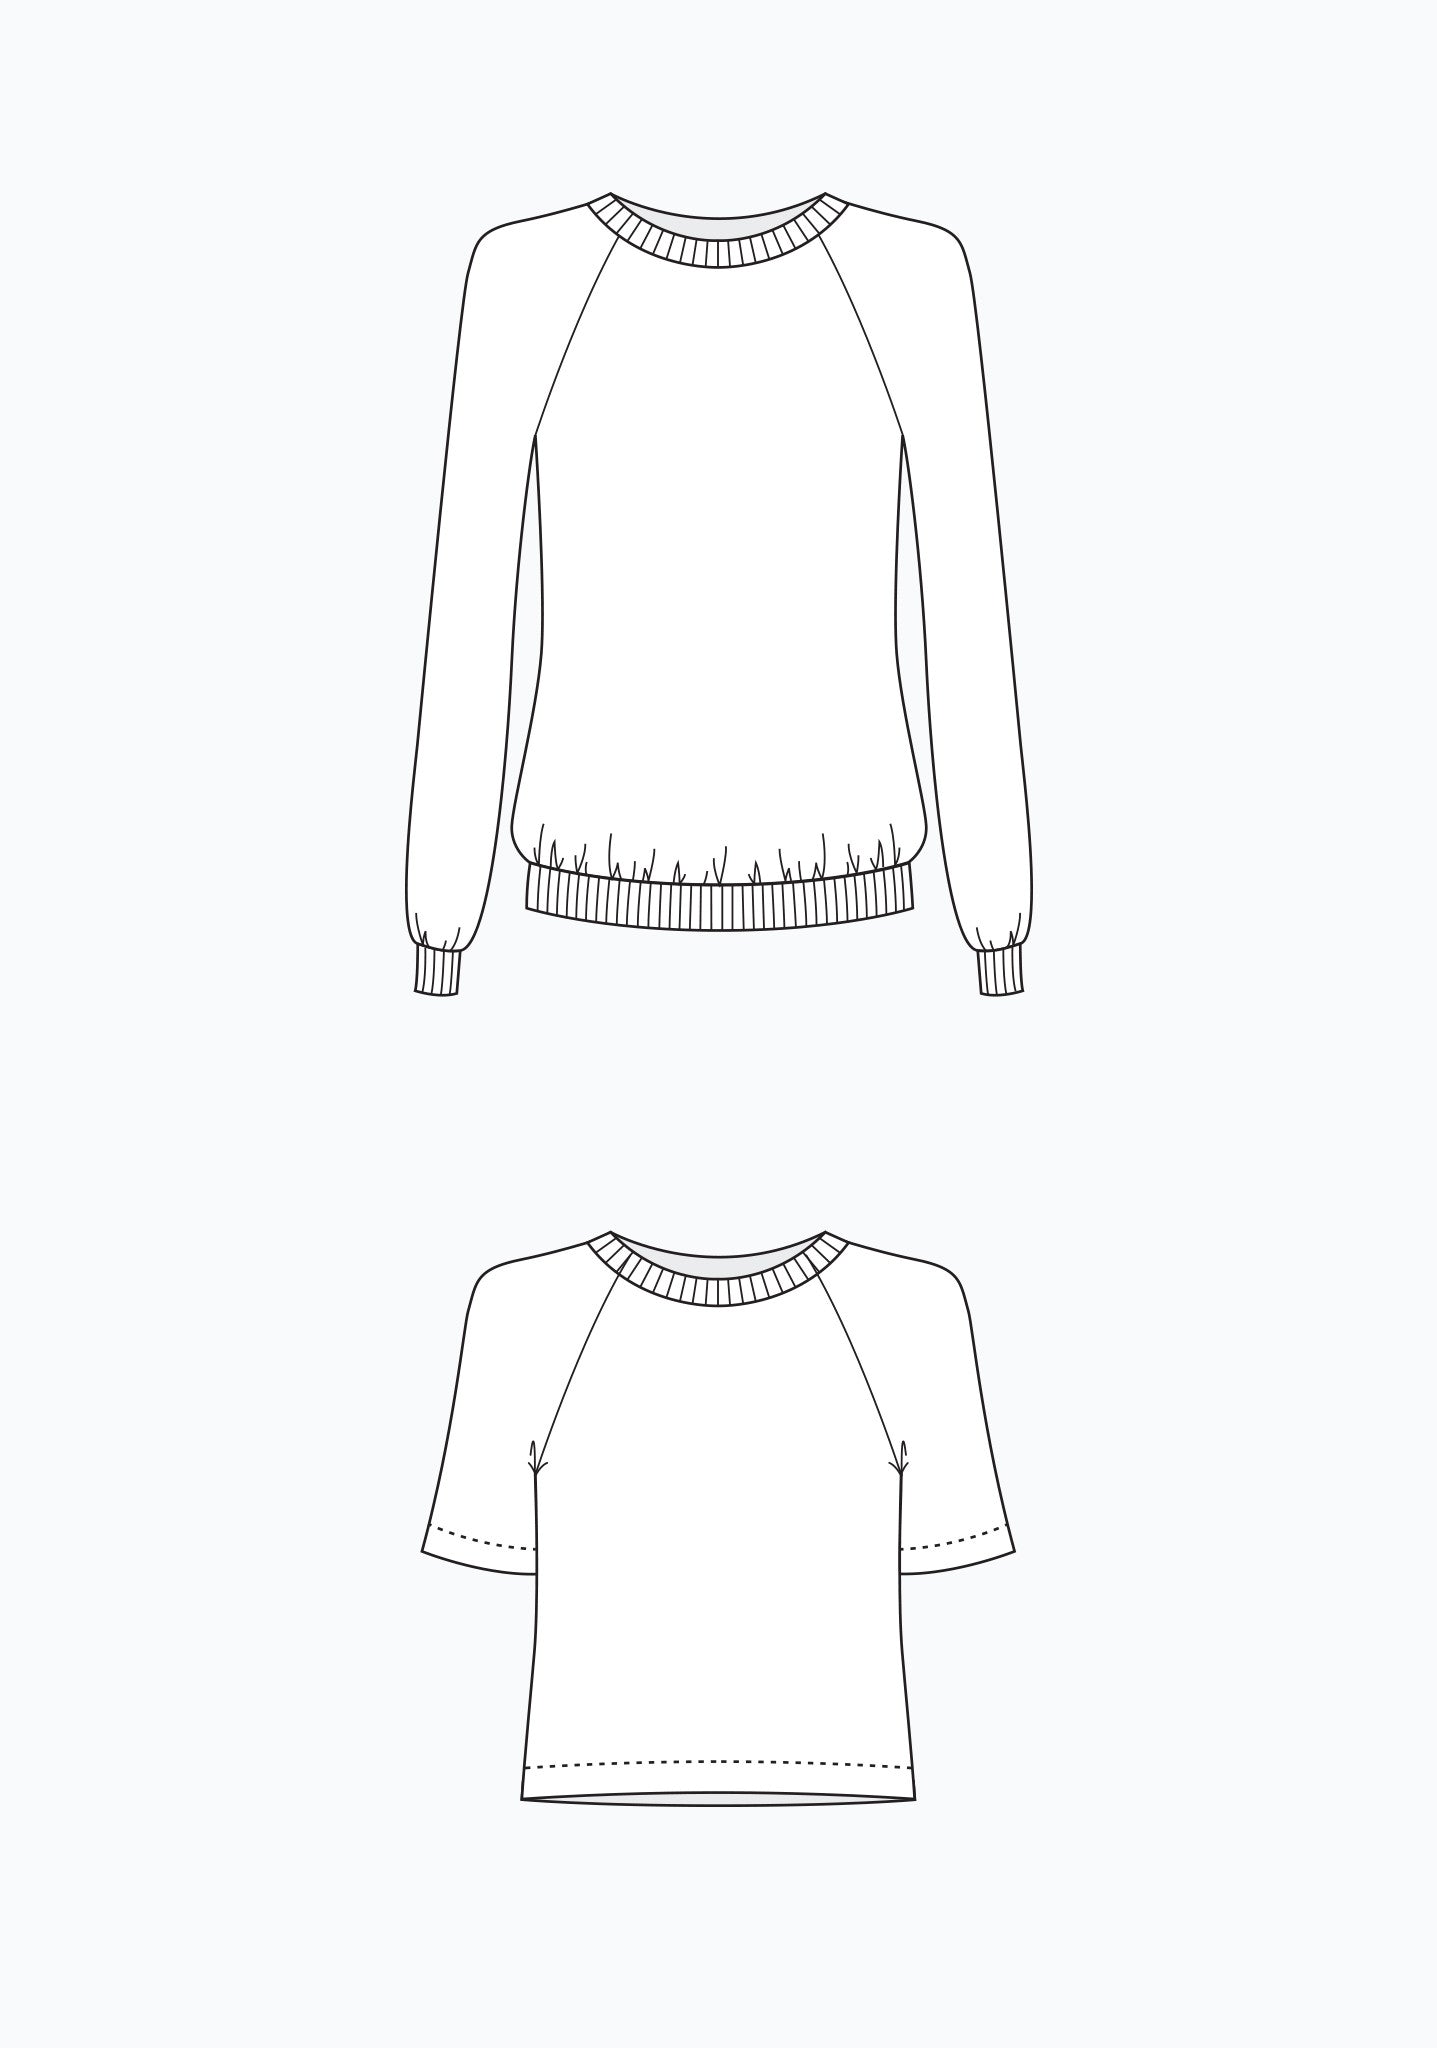
The Linden Sweatshirt pattern by Grainline Studio has been hanging out in my pattern stash for a while and this month I was finally inspired to sew it up as a Christmas gift for my sister. I'd toyed with making an Ogden Cami but kept dragging my feet until I realized it just didn't seem right. I'm sure you've seen other bloggers make the Linden as a gift, since it's pretty forgiving fit-wise and quick and satisfying to sew.

I grabbed two different pontes from my fabric stash. The black and white striped one is more stable and less stretchy than the lighter weight teal. I knew I wanted to use the stretchier teal for at least the neckband (otherwise I'd need to make the neckband longer to account for the lower stretch percentage of the striped ponte), and then opted to avoid extra side-seam stripe-matching by also using it for the back. The cuffs seemed a little small, so I figured they should go with the stretchier fabric, too. To avoid things getting too scrunchy and tight around the waist, I used a split-hem variation, with Jen's quick tutorial.  I prefer this look to a traditional sweatshirt hem anyway.


In reading through the pattern instructions, I could not, for the life of me, seem to find the seam allowance noted anywhere. I had a feeling it would be smaller than your traditional 5/8" since it's intended for knits. The only mention of the SA I found was in the "Sewing with Knits" section, under "Using a Serger" where it notes 1/4".  I used a sewing machine with a tiny zig-zag stitch for the entire thing, and a 1/4" SA. Also of note, in using Jen's tutorial for the split hem effect, follow her advice and make the back band significantly wider when you're cutting out (if you like that look where the back flap extends further down than the front). I only extended mine about half an inch, which turned out to be hardly noticeable once the thing was folded and sewn together.

Now that I've finally tried out this pattern, I'm looking forward to making one for myself! I have some classic (boring but soft!) grey french terry that I bought at Mood to copy Sallie way back when, and even got the matching ribbing. Hopefully I'll FINALLY get cracking on that soon. For now, here's a photo of my lovely sister modeling her Linden for us.


Wednesday, November 9, 2016

Finished Project: Testing The Acton Dress

Hi friends!

Today I'm here to share my tester version of the Acton dress from in the folds. Does she ever sew anything other than pattern testing?! YES! I hope to share my backlog of sewn projects soon -- there have been some glimpses on Insagram.


This was actually my second pattern testing experience, but the schedule included a break between our testing submissions and the formal release of the final pattern -- which seems rather reasonable when you think about the (supposed) purpose of pattern testing in the SBC. I wrote this post up back when everything was fresh in my mind from the experience, then returned to it and added in a few afterthoughts when the pattern was officially released. To see my thoughts on pattern testing in general, visit my earlier post, here.

For the test of the Acton dress, Emily was especially nice to work with because it was clear how much thought and care she'd put into her pattern, and also into the experience designed for her testers as we went through the process. She was friendly and communicative via email, and it was clear that she was truly grateful for and excited to have our help, respected us and our time, and she even created a private facebook group for us to share questions and ideas with her and each other. She was easygoing, and it did not feel like a process only intended to benefit her as the designer. All that, and, I also did not feel like she was 'sucking up' to us as her potential customers-turned-testers.

Regarding the pattern itself, the Acton dress pattern came as a layered PDF, so I was able to select only the size I wanted to print, which made for easier cutting when it came time to cut the pieces out. The princess-seamed bodice is the most fitted part, and ends a bit above the natural waist, so I went with my bust measurement to pick a size. All pages and pattern pieces were clearly labeled and easy to use, with markings matching up as they should, and the dress came together fairly quickly. This was not really a surprise, if you look at the pattern-making tutorials Emily has shared on her blog you can tell she knows what she's doing!

The fabric I used is a floral rayon challis I'd bought at JoAnn's a couple of years ago. Sometimes you can luck out there with surprisingly cute rayon, sometimes. This one seemed rather RTW to me, in a trendy Juniors Department way, hah! The bodice lining is an even lighter weight, sheer-ish, bright red rayon, also from JoAnn's, which you can see kind of trying to peek out in the back view below. I made View A in a Size E and skipped the in-seam pockets.  The only other adjustment I made was to take in the bodice side seams about a quarter of an inch each.

As a tester, I provided some feedback to Emily during the testing period, but it was only related to the instructions. The pattern itself was already in a great place and I didn't find I needed to suggest any changes to it. It turns out the only major change she's made since us testers got our hands on the pattern was to change the style of the visuals in the instructions from photos to illustrations (which I find are often more helpful, and able to provide more detail than an actual photo, so, yay!).

I had a fun time sewing the dress and I like that the style lines create something a little different than my usual vintage/midcentury-leaning look.


My favorite elements of making this dress were, oddly, the skinny straps and then inserting the invisible zipper (a must for this lightweight, flowy fabric). Past Sue would probably spit out her La Croix on the computer screen in shock reading that, but I found these normally pesky parts of the construction process to be quite satisfying (even though they did not go perfectly)! I recently got an invisible zipper foot for my sewing machine and it was really a game changer. That, and adding a thin strip of interfacing where I'd be inserting the zip, plus, first basting the zip in place (as Emily's instructions suggested) really made for a smoother process than the last invisible zipper I sewed (um, 3 years ago! can you tell I've been avoiding them?).

By that, I mean it was smoother until I realized I'd gotten a little overzealous with my zip stitching, and had accidentally stitched through the zipper teeth in a few places. Luckily, I just had to rip out those stitches (with my tiniest seam ripper and some tweezers) and sew back over the areas, carefully avoiding the teeth while staying as close to them as I could, rather than replacing the entire zipper (I'd initially thought I'd melted it with the iron when I couldn't zip it all the way up). Phew!


For next time, I might skip taking in the bodice seams and leave them alone, for a more relaxed fit, and also make the straps just sliiiightly longer. The straps come with extra length so it's entirely up to you how long you make them for your dress. You could probably even get really crazy and extend them several inches so you can criss-cross them, or even tie 'em into a halter.

* * *

I'm still (over almost 5 years later!) working on the whole posing for blog photos thing. Props (that I don't have to hold/actively do anything to), like trees and railings, help but sometimes there's just no hiding the poorly-timed awkward moves I find myself in. #dork


Sunday, May 22, 2016

Thoughts on Pattern "Testing"


Let me start by stating the obvious: I love sewing patterns. Big 4, vintage, indie, free, printed paper, PDF -- all kinds. But, lately, I've been wondering: when it comes to smaller scale indie pattern companies...

What do you think about "pattern testing" as it exists in the sewing blogosphere?

I have a few thoughts that have been swirling around in my mind. I hope you don't mind if I share them candidly here.

My own direct experience is limited. I've helped "test" two sewing patterns so far (2nd tester project coming to the blog soon!), and the differing experiences I had, plus what I have read about from other sewers, have got me pondering the whole idea of bloggers as testers, in general.

There seem to be a lot more cooks in the kitchen. The whole online sewing community has exploded in recent years compared to what it used to be. As more (and more) indie pattern companies* have popped up and the number of sewers turning to blogging & social media has increased, now more bloggers seem to be testing indie patterns, too -- which used to just seem reserved for those more famous bloggers. At the risk of understating, I'd say that the more people there are now creating patterns and testing them, the wider variety of experiences (and professionalism) you'll have across the process.

*These aren't always full-fledged companies and can include bloggers simply dabbling in pattern drafting & design. Combine them with more established indie pattern companies and it can feel like everyone and their mother are peddling sewing patterns. I appreciate variety, but is it too much of a good thing??

Recently, I've taken note of some less than ideal pattern testing scenarios mentioned by other sewers online: strict/short time frames; over-the-top intense "applications" to even try to be a tester for some designers; the blurred line between "testing" as purely a marketing effort or something a bit more scientific; inadequate recognition for time and effort spent; the prevalence of uber positive reviews; the impression that it's only for the "cool kids," part of some elite sewing clique; etc.

With all that in mind, I know some of us in sewing blog land (and elsewhere on the internet) are simply not interested in being pattern "testers," but, for me (so far), I find I do appreciate being offered this opportunity to try out an independent designer's pattern in this way! I'm not anything close to a professional (I don't even like to think of it as "testing" -- that sounds too meticulous for an amateur like me) when it comes to testing and my reasons for engaging in the process are self-centered. Honestly, I volunteer because I like to get a first look at a pattern before it hits the market and a peek at what the designer is like in off-the-blog interactions; I like that participating presents me with the chance and challenge to sew something I might not have otherwise chosen for myself (of course I only test things I'm OK adding to my wardrobe); and, lastly, I like that: duh, I get a free** pattern.

**free, in the sense that I did not have to pay money for it outright, though I recognize my precious time and not-free materials invested as part of the process.

The post-test process is what I actually find the most exciting. The "tester roundups" that appear on the website of the designer once the pattern is released to the public leave me with mixed feelings, though. On the one hand, I really enjoy poring over the variety of iterations of the pattern and different sewers' takes and tweaks on the design. Sometimes a certain sewer's version of a pattern can really sell me on something I wasn't quite convinced was for me. The part about this "roundup" that rubs me the wrong way, though, is that some designers only include the best (however they choose to determine this) tester photos, leaving out those who don't make the cut for the aesthetic -or whatever- they're going for, and giving the impression to readers that those shown on the roundup were the only testers involved.

In a sea of sewers trying to get blog-famous, monetize their blogs, get book deals and other gigs, and rack up new followers, you can imagine how this is a bummer. If, like me, you're not trying to do any of those things (well, I guess I wouldn't say no to new followers?) and you're simply excited to participate in more sewing goodness, you can see how it would feel like a bummer and an insult. I say, in this case, if you're going to show any, you've got to show all in order to be fair to your testers and your readers & customers. Then, though, there are designers who don't share any tester versions, and all pre-release pattern testing is done discreetly, out of public view (and I presume by professional pattern testers? -- there is such a thing, right?) Should (and could?) smaller indies do this, too, or is the cross promotion between the tester and the pattern creator a good thing that should be preserved?

I'm finding myself grappling with the pluses and minuses of this whole process a little bit, and thinking about the two extremes that the whole endeavor seems to fall between: meticulous, technical testing of a pattern and then surface-level, fluffy marketing. I find the whole thing overall to be both fascinating and annoying! I like being a tester sometimes, and it's neat that this is an opportunity that's now available to more sewers than it's been in the past. Also, obviously, marketing your products helps sell them, which is the whole point, but what's the best way to do that while trying to consider everyone in this community? It can be annoying enough to induce eye-rolls when a tested pattern seems to take over your blogroll and a significant chunk of your favorite blogs are all overflowing with overwhelmingly gushy tester reviews.

At this point, I don't know what the answer is or if I'll ever be able to distill my opinion on it down into a single point -- is the current state of affairs when it comes to indie pattern testing good or bad or something else?

What do you think about it?

Jump in!

Monday, March 7, 2016

Finished Project: Testing The Nita Wrap Skirt


Wait, this isn't an Elisalex dress or a men's shirt?!!

That's right, we've veered off plan a bit. Today I'm sharing my test version of the latest pattern offering from Beth of Sew DIY, the Nita Wrap Skirt. Surprise!


This is the first time I've helped a designer test a pattern, and I enjoyed the process. As there's a deadline, I'd be nervous to test something more complicated, but this beginner-friendly wrap skirt was great. As a selected tester, I got a PDF copy of the test version of the pattern for free, in exchange for my time and effort sewing it up and providing feedback. 


I appreciate Beth's design for this simple skirt. It's fitted at the waist and hips, but the wrap style offers more freedom of movement than a pencil skirt, which feels great, and the diagonal line of the wrap opening is sleek and interesting. It definitely fills a hole in my pattern library!


no explanation for this pose; it just felt right .


I sewed View A, the shortest option, in a straight size 14 and didn't need to grade between sizes. The finished skirt fit without any tweaks, another benefit of sewing an adjustable wrap skirt.


One of my favorite things about the skirt, other than its wardrobe workhorse potential, is that it provides a fun way to show off  bold prints or fabric colors that aren't necessarily flattering to your skin-tone (like mustard for me; so fun, but so ugly) -- attributes I'd previously relegated to sewing non-apparel, like throw pillows and bags. With bold prints in mind, I finally pounced on this black and white Cotton + Steel fern print I'd been eyeing since its release, and I really like the way it worked for this skirt. 

Just ignore the grey-ish tone, as it was a gloomy day and black fabric is notoriously annoying to photograph, so, these were all lightened a little.


The instructions are clear and straightforward, as you'd expect, and even break out separate steps for the lining. I did opt to go the lining route and used some dark purple-blue bemberg rayon from my stash. I tend to stock up on the stuff. It's pretty much the only type of lining I ever want to use; it feels wonderful but isn't as pricey as silk!

All in all, I would absolutely recommend this skirt as a quick, fun project for an experienced sewist, or as a great beginner project for a sewing newbie. It's my first time using one of Beth's patterns and her thoughtful design and instructions made this project a breeze. Next time I'm in need of a quick creative project, I might try the Nita Wrap Skirt in denim or eyelet. Can you tell I'm ready for Summer?


Saturday, January 16, 2016

Party Dress: Tips

For the past few years, read: most of my sewing career, I've been afraid of two things in particular: making full bust adjustments, and sewing princess seams. Now, by "afraid," what I really mean is lazy.

The last time I can remember sewing princess seams on anything is way back in 2013! Fitting the two curved bodice side-front pieces into the curve of the center front piece was always easier said than done. I remember practically losing my mind trying to magically ease them together (amid inadvertent pleats and rippling ...and cursing) on the fitted bodice of my Turquoise Taylor Dress. They look OK in the photos, but we all know there's often more to the story.


princess seams, c. 2013


For my current project, the Elisalex dress, I'm trying to cut the crap and I refuse to be lazy or scared. I have no idea why I did not simply Google techniques (how novel!) for sewing princess seams before, but this time I did -- and I am so glad! I found this simple tutorial and gleefully used it to produce perfectly-sewn princess-seamed bodices, one after the next, for my muslins.

The game-changers for me were: stay stitching and then clipping the curve before it's sewn. Magic!

That's all really great, but the truth is that it does not matter how lovely your princess seams are if your bust measurement exceeds that of the size you've sewn. Enter the dreaded FBA. Why "dreaded?" Because I'm lazy. This time, perhaps inspired by the ease with which I'd tackled the princess seams, I sucked it up and followed the easy tutorial on BHL's blog. ...Et voila! A bodice that fits both my bust and my waist.


BHL's tutorial

I'm happy to finally be ready (mature enough?) to step away from my sloppy, instant gratification sewing mindset, at least momentarily, and actually focus on making something that challenges my tiny little sewing skill set. And if I can do it, you probably already have can too!

I think my goal previously had been: produce a quick, cute garment! Now my goal is quality, and I mean it this time. I've seen bloggers write the same thing, but I don't think I'd truly felt it myself until now.

Have any of you found you've built unnecessary walls to avoid learning "scary" new skills? Please tell me I'm not the only one!


Sunday, December 13, 2015

Visions of Party Dresses

Oh, hi! Since I last checked in (months ago), I've been documenting some of my projects on Instagram. You may have seen: I've taken the Seamless Pledge again, sewn a Marthe blouse, a Grainline Studio Hemlock Tee, several Grainline/Fringe Supply Stowe tote bags, a pair of pillow cases using Sunni's tutorial, and a baby blanket following Suzie's method. The totes, pillow cases, and blanket were all gifts, gearing up for the upcoming holiday. Now it's time to start planning some decidedly selfish sewing, I'd say.

I've been dreaming about a feminine, shimmery, yet sophisticated, holiday dress that I can hopefully put together in time to wear to my company's fancy annual holiday party at the end of January. What's something fanciful that I don't have a true need for, yet want to spend lots of time focusing on and laboring over just for me? A pretty-princess-party dress! I've begun to scour the internet for inspiration, ordered a few swatches from Mood, and have started printing and taping together pdf pages.


one / two / three / four


The theme is gold, and the plan is to try the BHL Elisalex dress. The pleated tulip pouf is a new skirt silhouette for me, and the bodice hooked me with its sweet retro vibes. The fabrics I'm considering are dazzling and pricy, but my goal is to make something that truly feels nice and not just thrown together. This also means I'll be making a muslin (or two) first and focusing on fit and finishes for this dress. I aim to make something I'll really be proud of (even if that means some hand sewing, painstakingly stitching princess seams, and a dreaded FBA).

How's your holiday sewing shaping up? Do you have visions of sparkly party dresses dancing in your head, too?


Friday, July 10, 2015

I'm Back(logged)!

It's summertime in these parts and that means I'm back to sewing more regularly. For whatever reason! Oh, and winery-hopping.

I've finished a few projects and even wore my Sailor Top out in the wild.


Up first, my Grainline Archer that I started and almost finished at the Finch Makers' Retreat, where, yes--I met April Rhodes!

I struggled some with attaching the collar to the ...shirt (my sewing vocab is waning, I need to get back in the game!), and struggled much, much more making the very top buttonhole at the neckline. So much so, in fact, that I just ended up omitting it. I never button my shirts all the way up anyway.
Everything else was pretty much a breeze!

The next thing I finished was another wedding guest dress. I used the in-your-face cheerful fabric Kathy sent me awhile back, and my good ol' standby M5845. I somehow managed to get zero photos of the back while actually wearing the dress.


I curved and slightly raised the back opening and shortened the skirt, omitting the slit in the back. The dress was fun to wear, though the cotton did get a little rumpled from all the sitting in ~90F degree weather, and vigorous dancing at the wedding.

And finally, my latest finished make: Christine Haynes' new dress pattern, Sylvie! This dress is my jam. I've already started a second version, right after completing the first. I wore the first one, made out of a blue and red cotton/poly I found at the thrift store, to an Independence Day party on the lake!


I went by the finished garment measurements listed, knowing I wouldn't want very much ease in the bodice, and didn't end up needing to make any adjustments to end up with a super wearable first draft. For my second version, I'm playing with print placement & direction, and am shortening the skirt slightly, shaving a tiny bit off of the waistband, and actually remembering to add the horizontal stitching across the folded top part of the patch pockets.

Has anyone else become obsessed with this pattern, like I have? It's perfect for summer.

Monday, September 22, 2014

Late > Never? #OWOP14


So what if it's the end of September? Here I am with my OWOP outfits, for your viewing pleasure.

As you can see, I picked the Laurel dress/top by Colette Patterns. I wasn't even forced to repeat the Leopard Laurel on days 2 and 7, I just wanted to! That's how much I love that dress (read: secret pajamas).

I'm starting to feel my current style drift a little bit away from cutesy/quirky/colorful and lean more toward darker tones, sometimes more modern looks, and things that don't make me feel too twee. I found myself a bit uncomfortable in my Floral Laurel and Ruffle Sleeve Laurel this week. Even my peter pan collar was getting to me. Maybe it's a new life phase, maybe it's just the changing seasons. My favorite outfit of the week was day 5, my Back to School Laurel paired with sheer black tights and ankle boots. Ready for fall, y'all!

And, just because you've been nice enough to stick around in my recent absence, I'll let you in on a little secret. There's been no sewing happening in these parts as my sewing room is currently experiencing a dramatic revamping. I will be sharing some new sewing space shots once things are put back together, don't you worry. Until then, plz enjoy this image of my new computer desk (lives in under-construction sewing room), yay!


My place is a bit dark, so anything light/white/bright is super refreshing and a big help to keep things from feeling gross and drab. I've been taking a lot of inspiration from Heather Lou, Tilly, and Shanni's recent sewing space posts, so hopefully I'll end up with a sewing space that can keep the inspiration flowing.


Sunday, July 13, 2014

#SpringSewingSwap '14


Lucky me, I was paired up with Sally of TheQuirkyPeach for Kerry's annual Spring Sewing Swap. This girl knows me well! She hooked me up with a delightful bundle of vintage sewing goodies.


Thank you, Sally! I can't wait to try out these awesome fabrics and patterns. Oh, and the mini sticky notes are adorable, too. :)

I also lucked out when Kathy of TheNerdySeamstress posted the BHL Charlotte skirt pattern for sale on her Instagram. I managed to snap it up, and she even sent along this pretty fabric, too! It was such a nice surprise and even looks great with the bright pink pattern packaging.


Thanks for the happy mail days, Sally and Kathy! Now I need to start planning out some projects to make use of my new sewing goodies.

Thursday, July 3, 2014

A Dress Review

Hello again! I've finally returned. Despite the fact that I have 6 unblogged finished projects laying around, plus now 2 UFO's stuffed in the closet, I'm not here to share any new sewing projects with you just yet. Instead, I have a dress review for eShakti.

Before I went to Europe last month (yes, it's now July, blah), I was contacted by eShakti to see if I'd like to review one of their dresses. I remembered Lauren had reviewed two of their dresses and figured I'd give it a try. Plus, they have a lot of super cute, retro stuff, so, why not!

The intersting thing about this online shop is that you can customize their pieces (for a small additional cost) to select different featutures or variations than what's shown in the initial product view. I think this could be awesome for bridesmaid dresses. Prefer sleeveless? Need a longer skirt length? Done. I, however, read the measurements of the dress I'd picked and decided to just run with it, without customizing. Maybe next time...


Here's the view from the website of the dress I chose: Colorblock stripe hem poplin dress. I debated about trying to add something more versatile or practical to my wardrobe, since I had my pick of a section of the site (full of dresses that had not yet been reviewed by other bloggers -- they didn't want repeats). Then I just said "whatever!" and picked the one I was most drawn to.

It ended up a little tight in the bust, so I went sans bra, but other than that it pretty much fits. I especially like the scoop front/back necklines, the in-seam pockets, side zip, full-ish skirt, and bodice structure. It's not something I would be able to whip up for myself without some thought and searching for the right pattern (I don't have anything like this), so I'm glad I was able to try it out this way.

I think the only holdups I have about this dress are the fabric (it's very lightweight poplin and shows every little pucker and wrinkle) and the bodice fit (the waistband part of the bodice looks good sometimes and then frumpy at others), maybe I'll try to take it in a tiny bit. All in all, I'd say the dress is true to what was reflected on the site, and like a lot of their dresses, has a vintagey vibe reminiscent of something you'd find on ModCloth, which I totally appreciate. Thanks, eShakti!

Oh, and if you're interested in trying out your own eShakti dress (or jacket, or skirt, or shirt!), they're offering $25 off, for new customers - yay! Check them out on Facebook, Pinterest, and Twitter if you like what you see.


Poor Duke, he hates being held.


"someone! help me, please!!"

Disclaimer: I was provided with a free dress of my choosing, but was not otherwise compensated for this review. All delightfully insightful thoughts and opinions are mine.


Monday, May 26, 2014

me made may 2014: week 4


Day 1: Rayon Laurel Top + Me-altered Outlier Daily Riding Pants
Day 2: Black Chardon Skirt with Pockets and Belt-loops
Day 3: New, Unblogged Rayon Sencha Blouse + Gathered Skirt
Day 4: Anthro-Inspired Spotted Laurel Top + Me-altered Outlier Pants (Again)
Day 5: Denim Miette / Day 6: New, Unblogged Belcarra Top
Day 7: Unblogged Leopard Print Ponte Laurel Dress


Ooh, week 4! We are so close to the end. I must admit I'm missing some of my summery RTW clothes that I haven't been able to wear even though the temperatures are perfect for it. This week, I ended up with double documentation (two photos) of some outfits, so I figured I'd throw them in the ol' round-up collage for kicks. You'll also notice several "unblogged" items listed. I counted and I have a total of 6 things I've made but not shared here, so stay tuned for those in the near future. Not too near, I'm afraid, though. I'm going on vacation very soon and don't think I'll have time to share before then. You'll just have to follow me on instagram for the final #MMM14 installment, and watch this space in June for some treats upon my return. Bon Voyage!

Monday, May 19, 2014

Me Made May 2014: Week 3

Short post this week, y'all. I wouldn't say I'm struggling to continue to wear me-mades, but I am starting to repeat outfits and find myself relying more upon refashioned and me-mended items than I'd expected to. Also, some days I just don't want to wear anything cute or fitted at the waist. Some days I just want to be schleppy! Luckily the weather's been beautiful, so that helps. How's everyone else holding up?


Day 1: Not-Yet-Blogged spotted Coco / Day 2: Not-Yet-Blogged FBA'd Emery
Day 5: (Part 1) Refashioned Outlier Daily Riding Pant / (Part 2) Me-mended h&m Mathilde lookalike
Day 6: Me-mended Striped RTW dress / Day 7: Back to School Laurel


Monday, May 12, 2014

Me Made May 2014: Week 2


Day 1: Peter Pan Laurel / Day 2: Colorblocked Coco / Day 3:  Me-Mended RTW Striped Knit Dress
Day 4: Floral Laurel / Day 5: Refashioned Thrifted Striped T-shirt
Day 6: Refashioned Thrifted '80s Hawaiian Dress / Day 7: Denim Miette


So how was #MMM week two for everyone? 

Things I learned this week: 
1) Teal!
2) Red/white/blue!
3) Floral.
4) All of these work!
5) I need a NETTIE BODYSUIT.
6) How to do my first FBA.
7) Pretty Little Liars is just as fun to watch the 2nd time through.


Sunday, May 4, 2014

Me Made May 2014: Week 1


Day 1: Rehearsal Dinner Dress / Day 2: Unblogged Refashioned XXXL T-shirt 
 Day 3: Orange Gingham Sixties Shorts / Day 4: Unblogged Leopard Print Ponte Laurel Dress


How's everyone's first week of Me-Made-May 2014? Mine is off to a good start. Thank goodness spring is officially here, so I have more appropriate outfit options available. If you follow me on instagram, you've already seen these shots, but I like to do a little round-up each week, too. 

This weekend the weather was amazing and we did some antiquing. I wore my gingham shorts out into the wild for the first time. I also took a bunch of photos. Enjoy!